How to track & analyze user actions
Google Analytics
YMCA Website Services uses the Drupal contrib Google Analytics module to enable Google Analytics tracking on your YMCA Website Services site.
To get started, you should first create a GA property. Use the Analytics Help for assistance.
Configuration
Configuration is done at the standard module configuration page: /admin/config/services/google-analytics.
Google Analytics Version Compatibility
In the
9.2.11 release in November 2021, YMCA Website Services
added support for Google Analytics 4. If your site has been updated to YMCA Website Services 9.2.11 or greater AND the google_analytics module has been updated to 4.x you should be able to use GA4. Otherwise you’ll need to stick with GA3.
Search Tracking with Google Analytics
Prerequisites
- Google Analytics account to track you site should be created.
- Google Analytics contrib module should be enabled and configured to use existing GA account.
Steps
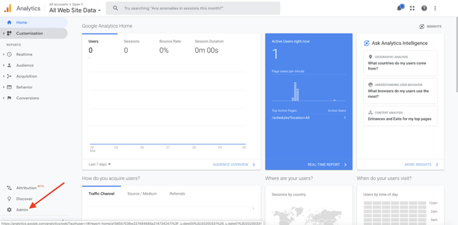
Log in to Google Analytics account that configured to track your YMCA Website Services site.
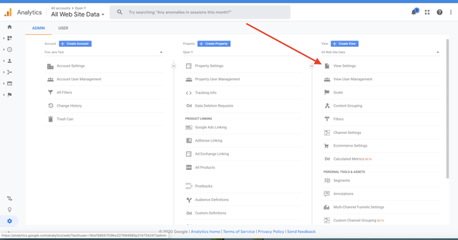
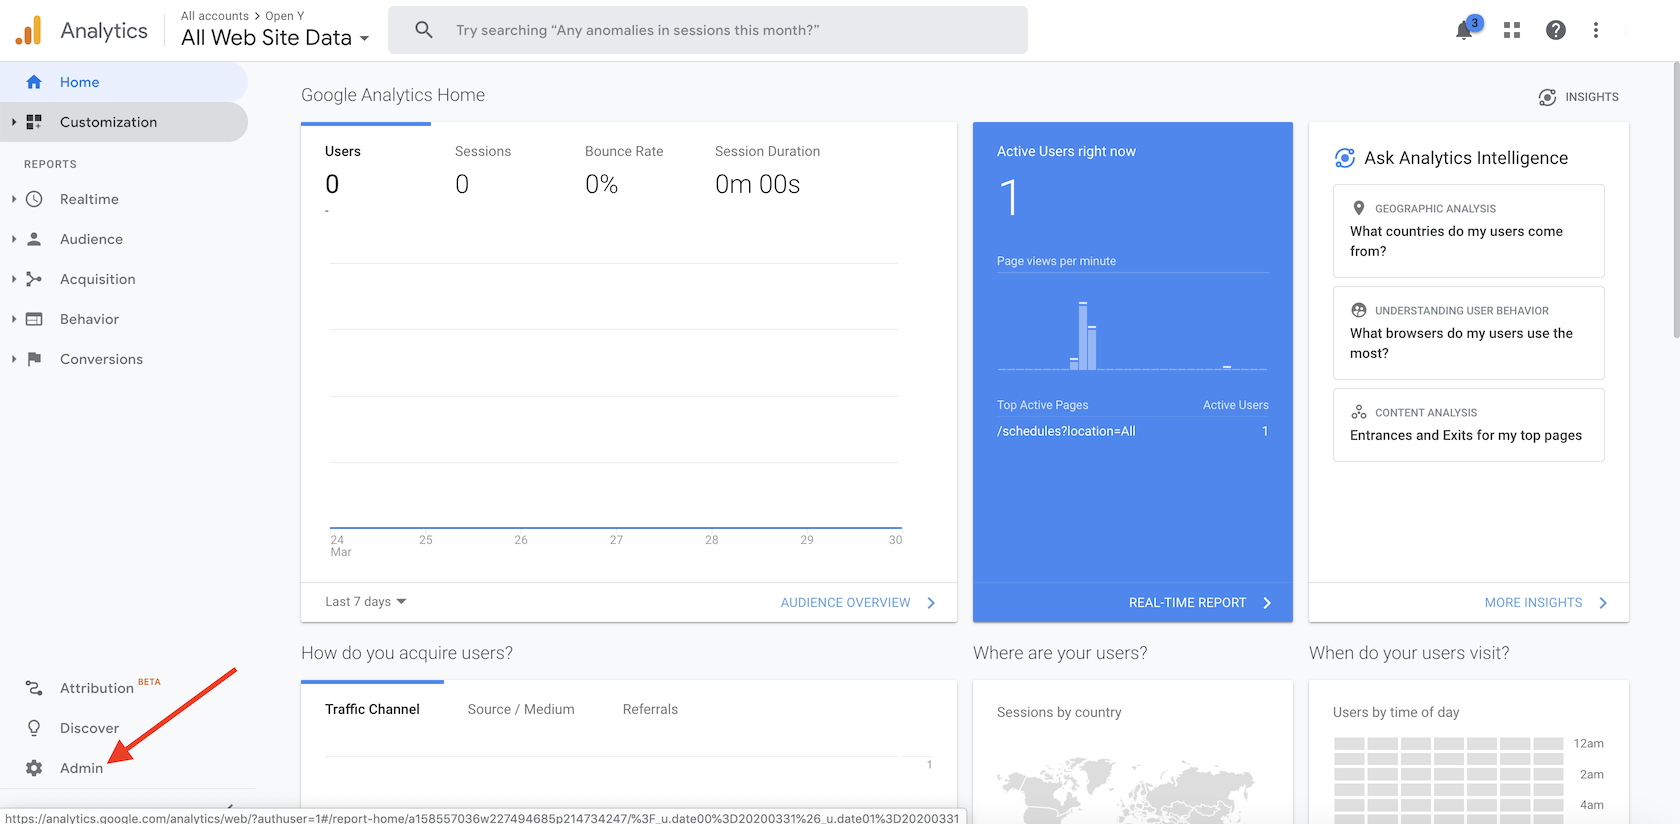
Click Admin button in bottom right corner of main screen
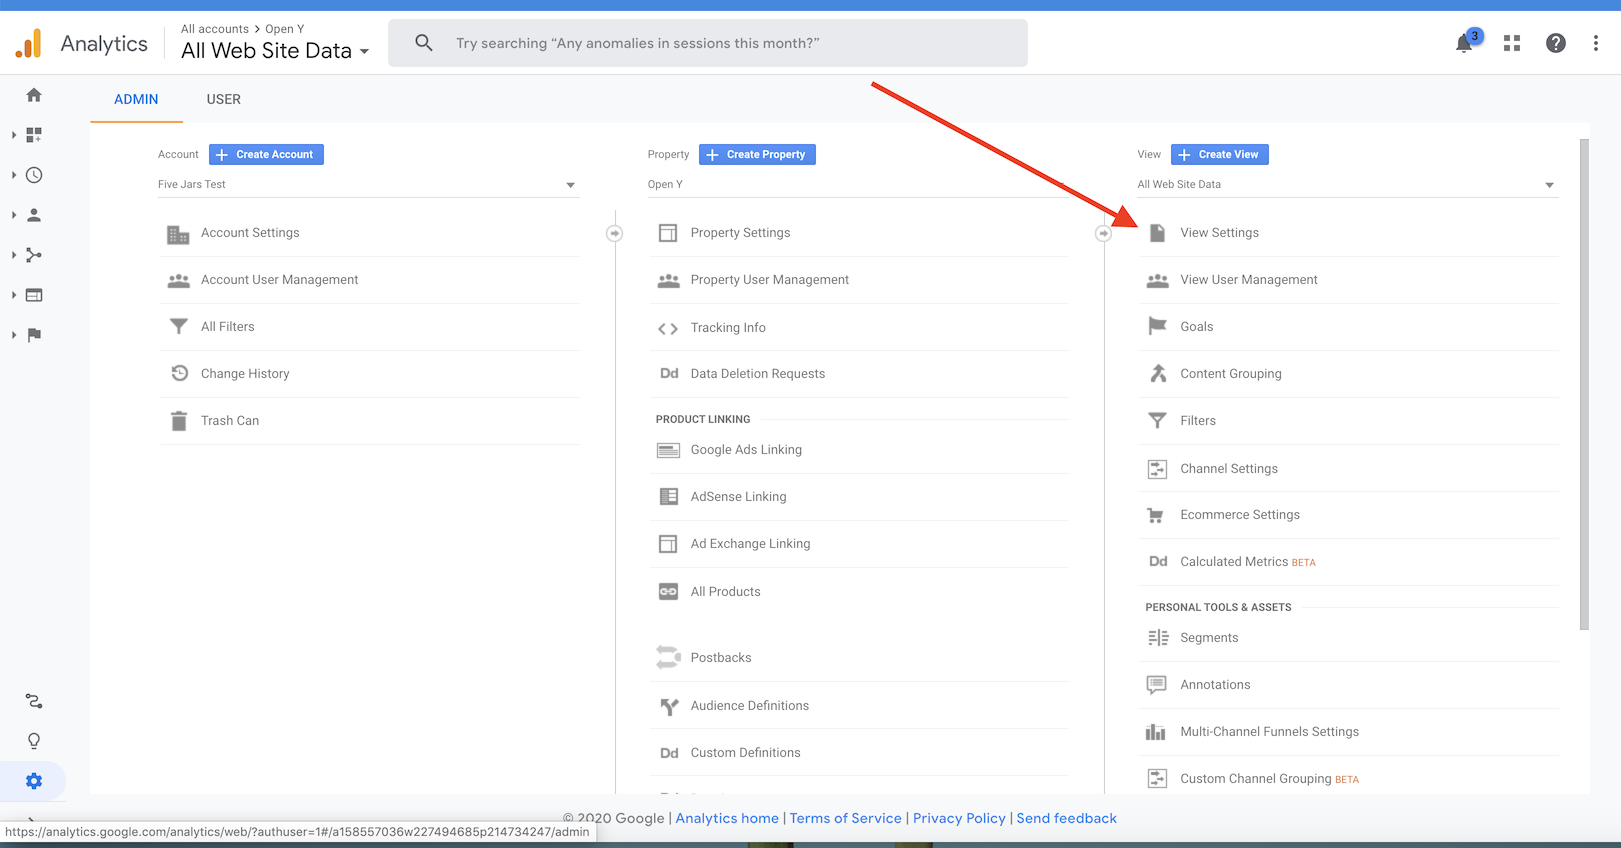
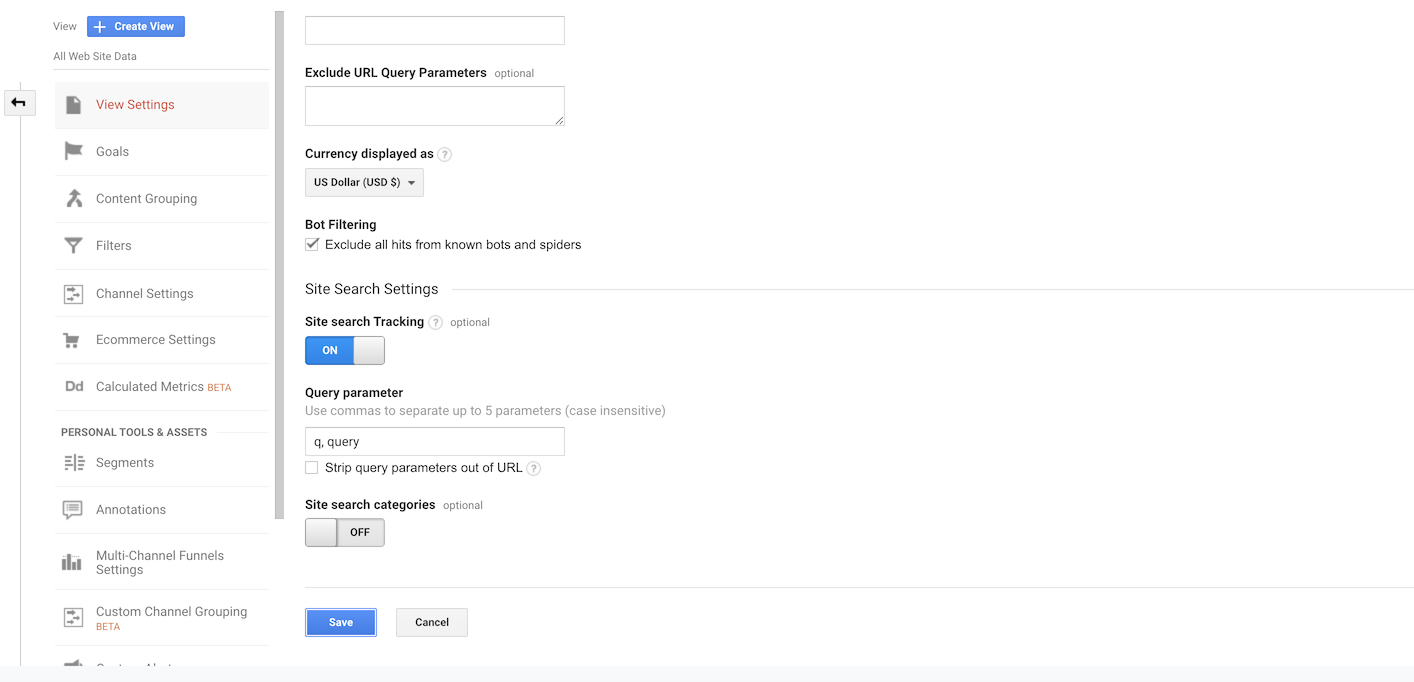
Click View Settings
Scroll to “Site Search Settings” section and enable “Site Search Tracking” switch

Fill query parameter field with
q, queryvalues and click SaveReports about the search tracking you can find at main screen in Behavior → Site Search Section
Attention: Data processing latency for search tracking reports is 24-48 hours (see Google’s support doc).
Data Layer
See also the Data Layer module README.
The Data Layers module output data on the page in a json format. By default it will output properties (langcode, vid, name, uid, created, status, roles) and related taxonomy for any node, user, or any route based entity.
A limited set of properties are available via the Data Layers configuration form at /admin/config/search/datalayer (langcode, vid, name, uid, created, status, roles).
Adding additional properties can be done through use of hook_datalayer_meta().
function my_module_datalayer_meta() {
  return array(
    'property',
  );
}
It will be added to the page as:
{
  "entityProperty": "whatever the value is"
}
Altering which properties will be output can be done via hook_datalayer_meta_alter().
function my_module_datalayer_meta_alter(&$properties) {
  // Override module norm in all cases.
  unset($properties['entityUid']);

  // Specific situation alteration...
  $type = false;
  if ($obj = _datalayer_menu_get_any_object($type)) {
    if ($type === 'node' && in_array(array('my_bundle', 'my_nodetype'), $obj->type)) {
      // Remove author names on some content type.
      if ($key = array_search('name', $properties)) {
        unset($properties[$key]);
      }
    }
    elseif ($type === 'my_entity_type') {
      // Remove some property on some entity type.
      if ($key = array_search('my_property', $properties)) {
        unset($properties[$key]);
      }
    }
  }
}
Adding additional data can be done using datalayer_add().
function _my_module_myevent_func($argument = FALSE) {
  if ($argument) {
    datalayer_add(array(
      'drupalMyProperty' => $argument,
      'userAnotherProperty' => _my_module_other_funct($argument),
    ));
  }
}
To alter the data to be output use hook_datalayer_alter().
function my_module_datalayer_alter(&$data_layer) {
  // Make the title lowercase on some node type.
  if (isset($data_layer['entityBundle']) && $data_layer['entityBundle'] == 'mytype') {
    $data_layer['entityLabel'] = strtolower($data_layer['entityLabel']);
  }
}